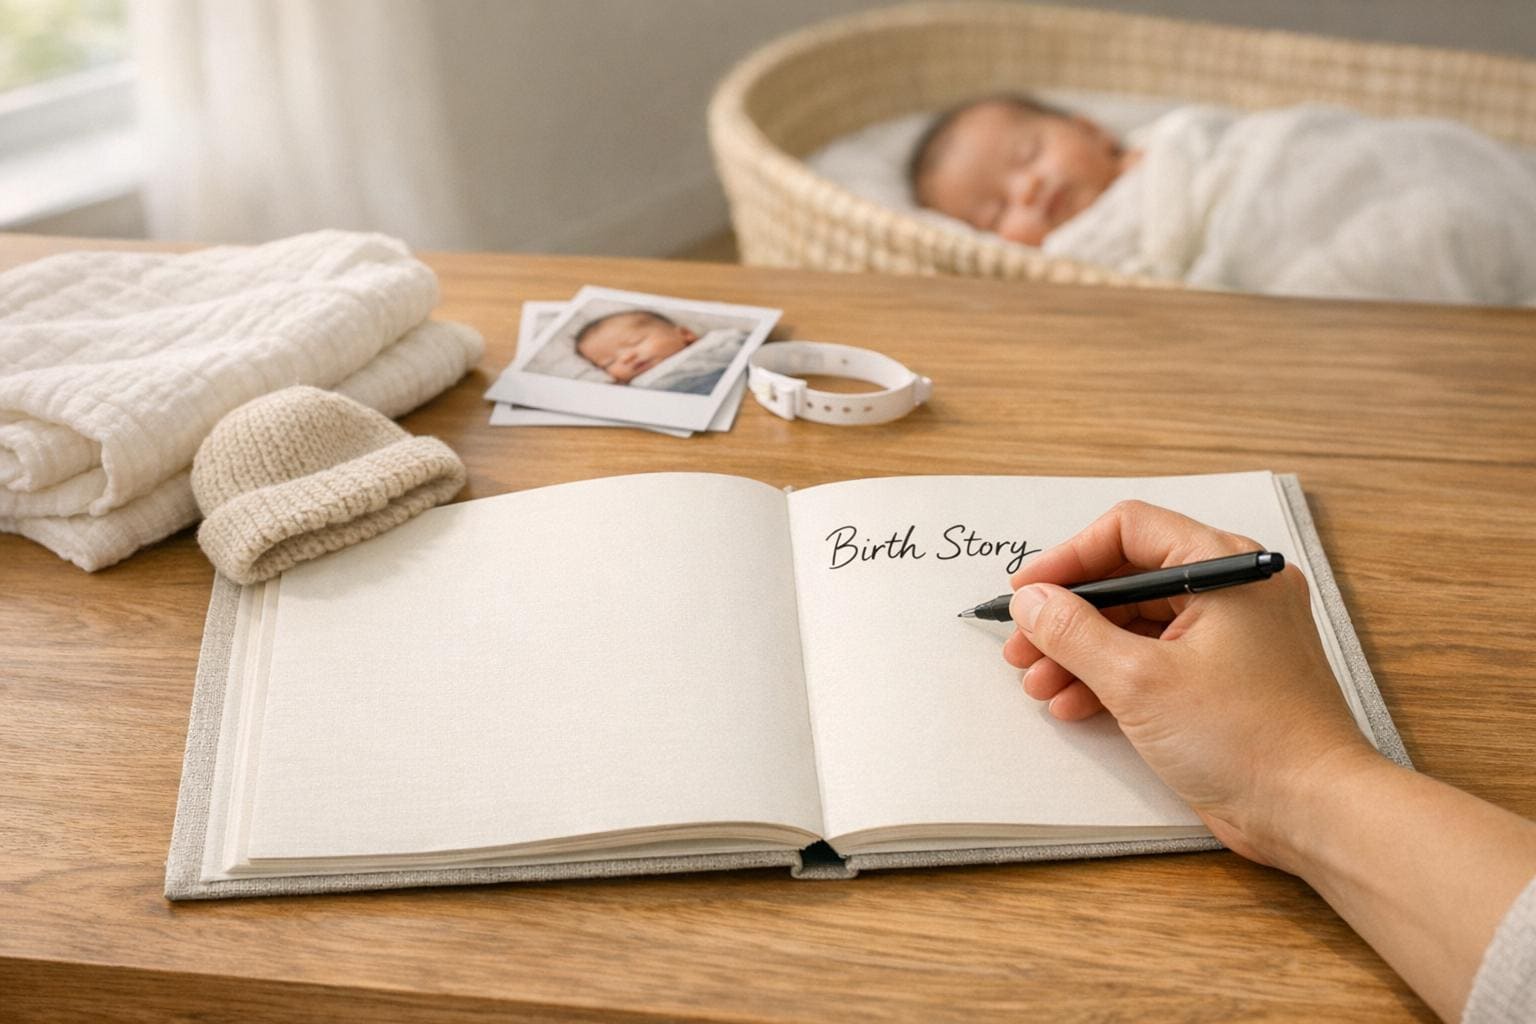


Your baby’s birth story is more than a list of events – it’s a way to preserve the emotions, details, and love that surrounded their arrival. Writing it down allows you to reflect on the experience and create a meaningful keepsake for your child. Here’s how to get started:
- Gather Details: Use hospital records, photos, and conversations with loved ones to build a timeline. Include key moments like the first contraction, the baby’s weight, and first skin-to-skin contact.
- Organize the Story: Structure it into three parts: before labor, the labor and delivery process, and meeting your baby.
- Set the Tone: Decide if you want a warm, personal letter to your child or a straightforward narrative. Address challenges with care and focus on moments of love and strength.
- Add It to a Baby Book: Choose a format that fits your story, whether it’s a detailed narrative or a photo essay with captions.
- Edit and Finalize: Review your story for clarity and emotional impact. Tailor its length to fit your baby book.
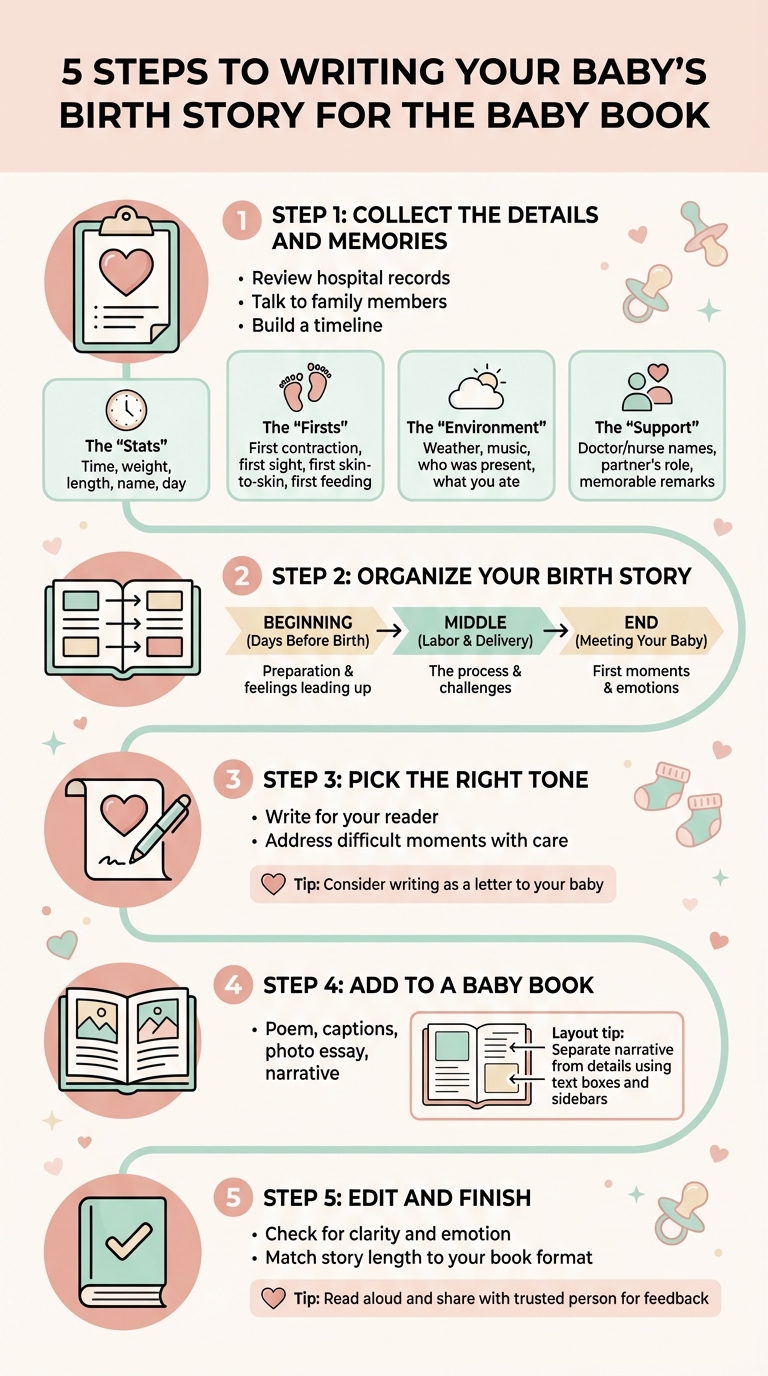
5-Step Process for Writing Your Baby’s Birth Story
Step 1: Collect the Details and Memories
Start by gathering both factual details and sensory memories from the first hours and days after your baby’s birth. Acting quickly can help preserve moments that might otherwise fade over time.
Review Hospital Records and Documents
Begin with official records to establish a reliable timeline. Hospital paperwork, birth certificates, and medical notes provide precise details like dates, times, and measurements. Check your baby’s hospital bracelet for the check-in time, and look at baby announcements for stats like birth weight and length. If you used a contraction timer app during labor, review that data to pinpoint when active labor began. You can also request medical records from your OB/GYN or midwife to confirm key milestones, such as dilation progress, medical interventions, and the exact time of birth.
Don’t forget to check your phone. Photos, texts, and emails from labor can help fill in gaps, especially if you use metadata to verify timestamps. Even your email “Sent” folder might reveal real-time updates from your partner or family.
Next, gather firsthand accounts from those who were present for the birth.
Talk to Family Members Who Were There
Your partner, doula, or family members who were in the delivery room might recall details you missed. As Christy Lee Knutson, Founder of BirthMemoirs.com, suggests:
“Consider talking with your spouse, doula, mother or anyone who will be in the room with you at delivery. Ask in advance that they take a few minutes, whether during labor or immediately after, to jot down notes for you – small details that you might not have noticed or may quickly forget.”
Ask sensory-focused questions to bring out vivid memories. For example, “What did you notice when you first held the baby?” or “What sounds stood out in the delivery room?” Record these conversations so you can revisit them later. Keep in mind that their perspectives may differ from yours, offering a more rounded view of the experience.
Blend these personal stories with your documented records to create a detailed and heartfelt timeline.
Build a Timeline of Events
Once you’ve gathered all the details, organize them into a clear sequence to tell the story of your baby’s arrival. Start with late pregnancy and move through labor, delivery, and the first days postpartum. Using a “Before, During, and After” structure can help you craft a natural narrative. Include physical facts (like contraction patterns and medical interventions), emotional moments (such as your thoughts during labor), sensory details (like the coolness of Doppler gel or the smell of hospital soap), and snapshots of support (like your partner’s reactions or memorable comments from the birth team).
Here’s a quick guide to the types of details to include:
| Category | Specific Details to Gather |
|---|---|
| The “Stats” | Time, weight, length, name significance, and day |
| The “Firsts” | First contraction, first sight of baby, first skin-to-skin contact, and first feeding |
| The “Environment” | Weather outside, background music, who was in the room, and what you had eaten |
| The “Support” | Names of doctors/nurses, your partner’s role, and memorable remarks from the birth team |
External records help anchor your timeline. As Dallas Arthur, a professional birth photographer, explains:
“The hormones and emotions of birth make our memories hazy. Write down what you can.”
Even if it’s just a rough, stream-of-consciousness draft written in the first 24–48 hours, capturing those raw emotions early can help preserve the story before exhaustion sets in.
sbb-itb-e3574dd
Step 2: Organize Your Birth Story
To craft a meaningful birth story, arrange your details into a clear, chronological flow. A simple “Before, During, After” structure works well to keep your narrative organized. As Forever Young Autobiographies puts it:
“Certainly every birth is different but as a general guide have a beginning, middle and end.”
Breaking your story into these three parts helps you decide where each detail fits, ensuring the story unfolds smoothly without jumping back and forth in time.
Beginning: The Days Before Birth
Start by setting the stage with the days leading up to the birth. Use this section to paint a picture of anticipation and preparation. How were you feeling physically and emotionally during those final weeks of pregnancy? Were there last-minute tasks or rituals you completed? Describe the atmosphere at home – was it calm, chaotic, or filled with excitement?
Include specific details about the day labor began. What were you doing when the first contraction hit? Maybe you remember what you were eating, wearing, or even watching on TV. Share key moments like heading to the hospital or preparing your home birth space. These small but vivid details help ground your reader in the moment and build anticipation for what’s to come.
Middle: Labor and Delivery
This is the core of your story, where the action unfolds. Focus on the labor process itself – how your contractions progressed, how long you pushed, and whether you had a vaginal birth or a C-section. Blend clinical facts, like times and measurements, with sensory details to bring the scene to life. What did you hear, feel, or even taste during labor? Maybe it’s the sound of a heart monitor, the feel of a loved one’s hand in yours, or the coolness of the Doppler gel.
Don’t forget to highlight the people who supported you. Was there a moment when your partner’s reaction moved you? Did a nurse say something encouraging that stuck with you? These personal touches make the story feel intimate and relatable.
Also, share your choices for pain management and any medical interventions you experienced. As writingyourbirthstory.com explains:
“These markers [before, during, and after] can help provide a framework to follow.”
The birth itself becomes the climax of your story – the moment everything changes.
End: Meeting Your Baby
After the intensity of labor, shift into the tender moments of meeting your baby for the first time. Reflect on your first impressions. What did your baby look like? Did they remind you of anyone? Describe the emotions you felt when you made eye contact or held them for the first time.
This is also a great place to share the story behind their name and why you chose it. Document those early milestones – the first cry, the first feeding, or the first time you felt their skin against yours. Whether your emotions were joyful, overwhelming, or even unexpected, include them honestly. This final section ties your story together, offering a space to reflect on the experience and its impact on you.
Step 3: Pick the Right Tone for Your Story
The tone you choose for your birth story has a big impact on how it resonates emotionally. It creates the mood and sets the stage for how your reader – whether that’s your child in the future or a family member – will connect with those moments. Think about who will read this story and what you want them to feel as they turn its pages.
Write for Your Reader
Start by identifying your audience. Are you writing this for your child to read someday, for yourself as a keepsake, or for extended family? Knowing your audience will shape how you write. If your focus is on your child, lean into themes of love, anticipation, and joy. Use warm, heartfelt language to show how deeply they were wanted. As Poppy Therapy explains:
“Sharing your birth story with your child not only passes along the knowledge and facts of the day they arrived, but also narrates their first chapter with tenderness, love, and gratitude”.
One effective approach is to write the story as a letter to your baby. This format naturally encourages an intimate and loving tone, helping you emphasize the special bond between you and your child. Plus, it can strengthen the parent–child relationship and even reduce stress within the family dynamic.
Address Difficult Moments with Care
If your birth experience included challenges – like complications, unexpected interventions, or moments of fear – acknowledge them honestly but thoughtfully. Keep in mind that this story will live in a baby book, so balance truth with sensitivity for your future reader.
To start, write a completely unfiltered version just for yourself. Let all your emotions flow without worrying about who might read it. As PregActive puts it:
“It’s okay to say: it was traumatic and still the best day of your life… you hated every second and then fell instantly in love”.
This personal version can be a powerful tool for processing your feelings. Christy Lee Knutson, founder of BirthMemoirs.com, highlights the therapeutic value of this process:
“writing… takes some of the power away from painful experiences and brings acceptance and peace closer”.
Once you’ve worked through those raw emotions, create a version for the baby book that focuses on resilience and strength. Instead of diving into every medical detail or moment of pain, reframe the harder parts by reflecting on what they taught you about your strength. Close those sections with what’s often called “the shift” – that moment when everything changes: the first cry, eye contact, or the warmth of skin-to-skin contact. These moments provide a sense of emotional resolution.
If you’re still processing trauma, give yourself time before finalizing your story for the baby book. The most important thing is to create something that feels true to your experience and serves as a meaningful gift for your child.
Once your tone feels right, you’re ready to weave your story into the pages of your baby book.
Step 4: Add Your Story to a Baby Book
Once you’ve nailed the tone of your story, it’s time to decide how to bring it to life in your baby book. The format and layout you choose will influence not just how your story looks on the page but also how it ties together with your other treasured memories.
Choose Your Format and Layout
Get creative with how you present your story. You could try a poem, short Instagram-style captions, a photo essay with brief notes, or even write from your baby’s perspective.
When designing the layout, think about separating the narrative from the details. For example, you could use text boxes for the main story and sidebars or bullet points for stats and dates. Catherine Saunders, author of Made & Kept, suggests keeping it simple:
“Fewer photos means less cluttered pages, easier books to enjoy, and less design work for you”.
Don’t forget to include sensory details that bring the day to life. Whether it’s the sound of your baby’s first cry or the smell of the hospital room, these little touches help tie moments together in a way that feels seamless and heartfelt.
Bring Your Story to Life with Meminto Stories
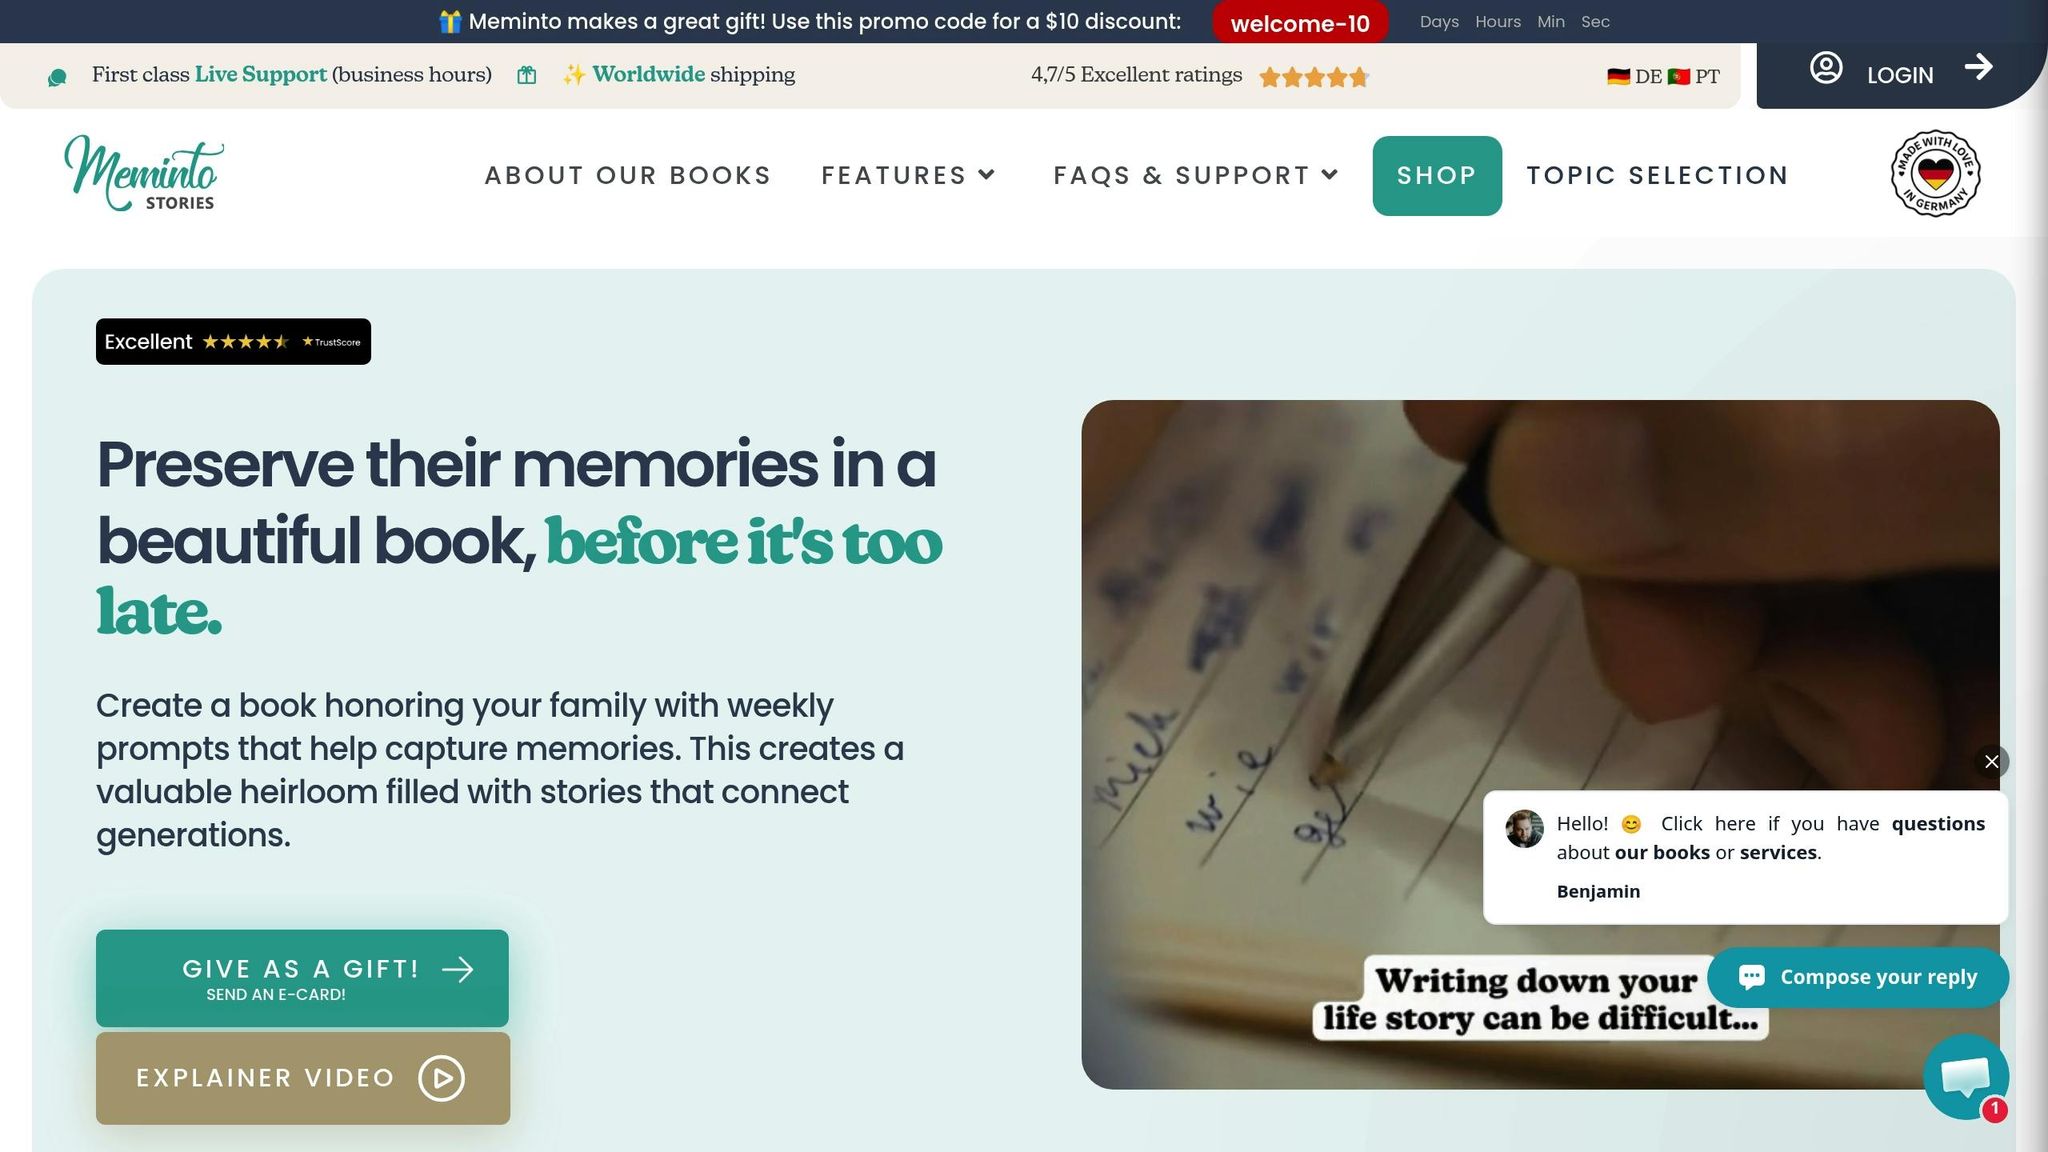
Once your story is ready, you can transform it into a professionally designed baby book. Meminto Stories makes this process straightforward. Their platform helps you overcome the dreaded blank-page syndrome with guided prompts and a StoryScribe feature that lets you record your thoughts hands-free. An AI assistant polishes your raw notes into a cohesive narrative, and QR codes let you link physical pages to digital memories like videos or photos of your baby’s first moments.
When you’re ready, Meminto prints your story as a high-quality hardcover book. The standard DIN A5 format starts at $99 for 100 pages, with options for up to 300 pages if you want to include a more detailed account.
You can also invite others to contribute. Whether it’s your partner, a grandparent, or even your doula, Meminto’s collaborative features allow everyone to add their own perspective. This adds depth and richness to your baby book, capturing the day your baby arrived from multiple viewpoints.
Step 5: Edit and Finish Your Birth Story
Check Your Story for Clarity and Emotion
Start by writing a raw draft without worrying about grammar or structure – just let your thoughts flow. Once you’ve poured everything onto the page, give yourself some time before starting the editing process. If the experience was overwhelming, waiting a few weeks can help you gain perspective and approach your story with fresh eyes.
When you’re ready to edit, read your story aloud. This helps you hear how it sounds and ensures it reflects your voice and emotions. Pay attention to sensory details that bring the story to life. For example, instead of saying you felt “nervous”, describe the texture of your hospital gown or the steady beep of the baby’s heart monitor. These details can make your narrative more vivid and relatable.
As you refine the timeline, make sure the sequence of events is clear and easy to follow. Sharing your draft with someone you trust – like a partner, friend, or doula – can give you fresh insights. They might spot areas where the emotional depth could be expanded or where the flow needs adjustment.
Once the story feels complete, focus on aligning its length with the format of your baby book.
Match Your Story Length to Your Book
After revising your story, think about how it fits within the design of your baby book. For example, if you’re using a service like Meminto Stories, you’ll want to tailor your narrative to fit their page limits. Meminto Stories offers three options: the Basic plan (up to 100 pages for $99), the Extended plan (up to 200 pages for $129), and the Premium plan (up to 300 pages for $149).
If your story is too brief for the format, consider adding more perspectives from your birth team or expanding on sensory details to enrich the narrative. If it’s too long, trim it by focusing on the most emotionally powerful moments – like the first cry or the instant you held your baby for the first time. These pivotal moments can serve as the foundation for your story, keeping it meaningful without unnecessary details.
Tailoring your story to fit your chosen format ensures it not only captures your experience but also fits perfectly into your keepsake.
Conclusion
Reflecting on your baby’s birth story is a chance to preserve the emotions, anticipation, and love surrounding their first moments. By collecting details, shaping your narrative, and carefully editing, you create something truly special – a story your child can hold onto for a lifetime. These words serve as a heartfelt reminder of the deep love that welcomed them into the world.
While photos and videos capture what happened, a written story reveals the emotions behind those images – the laughter, the tears, and the moments that make each picture meaningful.
With tools like Meminto Stories, turning these memories into a beautifully designed keepsake becomes easier. Guided prompts, AI writing support, and flexible input options (like voice recordings for busy parents) help ensure no detail is missed. Plus, you can invite family members to contribute, creating a richer, more complete collection of memories.
As photographer Anja Poehlmann shared:
“The quality of the books was actually better than I expected. I’m really impressed.”
Don’t wait for perfection to capture the beauty and chaos of your baby’s arrival. Your birth story will grow into a source of comfort and connection, offering your child a lasting sense of love and belonging. By weaving together these memories, you’re creating a timeless gift that ties the past to the future.
FAQs
What if I can’t remember much about the birth?
If your memories of the birth feel fuzzy, try focusing on the emotions, the atmosphere, or any details that stand out. You can piece together the story by talking with your partner or family, reviewing notes, hospital records, or even looking through photos. The aim isn’t to recall every single detail but to capture the essence of that incredible moment. Taking it slow, or using guided prompts, can help you craft a meaningful account that reflects just how special the experience was.
How do I write about a traumatic or complicated birth?
When recounting a traumatic or complex birth experience, it’s important to give yourself the time and space to process what happened. Acknowledge the emotions that come with it – whether they’re overwhelming, confusing, or somewhere in between. Reaching out to trusted friends, family, or even a professional can offer comfort and perspective during this time.
Writing about the experience can also be incredibly therapeutic. Use it as an opportunity to express your feelings openly and without judgment. Focus on documenting the event in a way that feels personal and supportive to your healing process, prioritizing your emotional well-being above all else.
How long should a birth story be for a baby book?
A birth story for a baby book can be as brief or detailed as you want – it’s all about capturing the moments that matter most to you. Whether it’s a few heartfelt paragraphs or several pages filled with vivid memories, focus on what feels meaningful and best reflects your personal journey.