


Scanning old photos is a practical way to preserve your memories before they degrade. Printed photos can fade, tear, or get damaged over time, but digitizing them ensures they’re protected, easy to share, and ready for future generations. Here’s a quick summary of the steps to get started:
Key Takeaways
- Prepare Your Photos: Organize by size or event, clean them with a microfiber cloth, and handle fragile ones carefully.
- Choose the Right Scanner: Flatbed scanners offer high resolution for quality, while sheet-fed scanners are faster for large collections.
- Set Scanner Settings: Use 300 DPI for standard photos and 600 DPI for enlargements. Save as JPEG for sharing or TIFF for archival purposes.
- Start Scanning: Position photos properly, preview before scanning, and use batch scanning for efficiency.
- Organize and Backup: Name files clearly, sort them into folders, edit for brightness or color, and back up using the 3-2-1 rule (e.g., cloud storage, external drives).
Digitizing your photo collection not only preserves your memories but also allows you to enhance and share them effortlessly. Once scanned, consider turning your photos into personalized memory books for a lasting keepsake.
Step 1: Get Your Photos Ready for Scanning
Getting your photos organized and cleaned before scanning is a crucial step to ensure high-quality digital images. A little preparation upfront can save you time and help you capture every detail with clarity.
Sort and Organize Your Photos
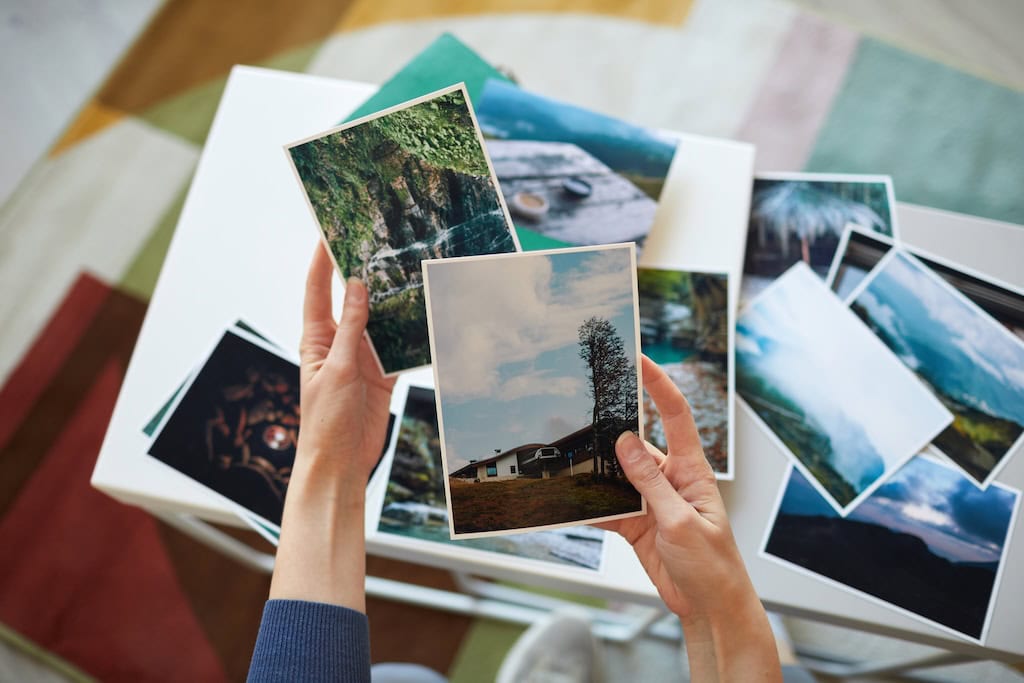
Start by grouping your photos based on size, type, or event. This makes it easier to adjust scanner settings and manage your files later. Toss out duplicate copies and set aside any photos that are too damaged to scan effectively.
Separate color prints from black-and-white ones since they require different scanning settings. If you’re working with a large collection, organizing by events or time periods can be helpful. This not only keeps things manageable but also makes it easier to name files consistently as you work through your collection.
Clean Your Photos Thoroughly
Dust, smudges, and fingerprints can ruin an otherwise perfect scan, so cleaning your photos is essential. Use a clean microfiber cloth to gently wipe each photo. For stubborn marks, lightly dampen the cloth with distilled water and wipe from the center outward in one smooth motion.
Compressed air is great for removing dust, but make sure to hold the can upright and at least 6 inches away from the photo. Shaking the can or using it at an angle can release liquid that might damage the image.
Avoid using paper towels, tissues, or standard cleaning cloths, as they can scratch the surface of your photos. Also, steer clear of household cleaners, alcohol, or any chemical solvents – they can cause irreversible damage.
Handle Damaged Photos Carefully
Old or damaged photos need extra attention to prevent further harm during scanning. If you’re dealing with delicate or fragile images, wear clean cotton gloves to avoid transferring oils from your hands onto the photos.
For photos that are bent or curled, place them between sheets of acid-free paper and weigh them down with a heavy book for a few hours. This gentle flattening process can improve scan quality without risking damage to the photo.
If a photo has tears or loose pieces, scan it as is. Minor issues like these can often be fixed later through digital restoration. However, for extremely fragile photos, weigh the risk carefully – sometimes it’s better to preserve the original than risk losing it entirely during scanning.
Once your photos are clean and organized, you’re ready to move on to selecting the right scanner to capture every detail.

Step 2: Pick the Right Scanner
The scanner you choose can make a huge difference in the quality of your digital images. Whether you’re digitizing a few cherished photos or tackling a massive collection, your choice will depend on the size of your project, your budget, and the level of detail you want to capture.
Flatbed Scanners for High-Quality Results
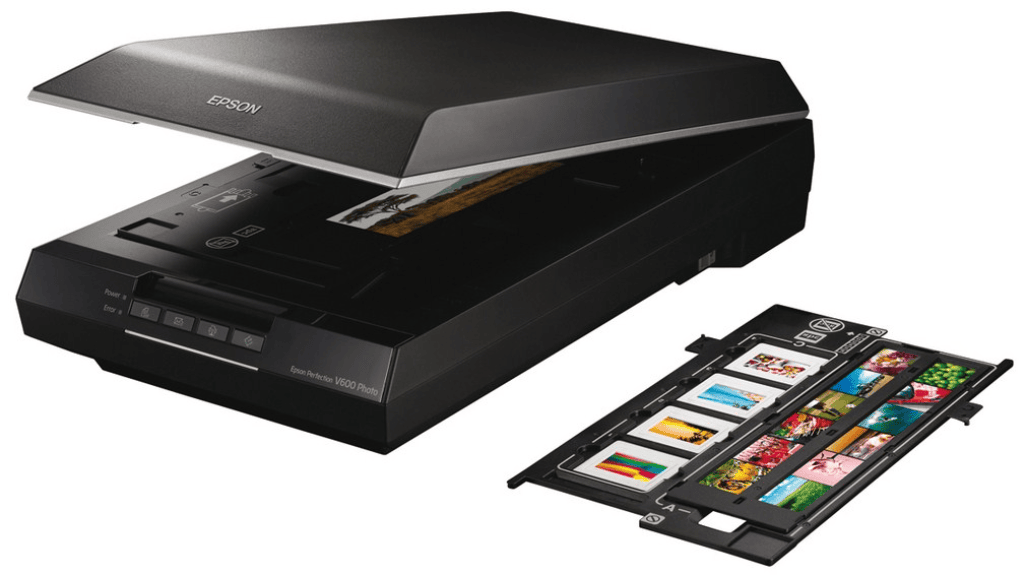
If you’re aiming for top-notch image quality, flatbed scanners are the way to go. These scanners let you place photos face-down on a glass surface, making them ideal for anything from small snapshots to larger 8×10 prints.
One of their biggest perks is versatility. You can scan multiple photos at once and crop them later, which saves time when working through stacks of pictures. Plus, most flatbed scanners designed for photos offer resolutions of 4,800 DPI or higher. This level of detail is perfect for enlarging images or creating sharp, high-quality prints. Another advantage? Flatbed scanners are gentle on delicate or warped photos since they don’t use a feeding mechanism that might cause damage.
For example, the Epson Perfection V600 (priced around $200–$300) is a great choice for most home users. If you’re looking for advanced features like holders for film negatives and slides, the Epson Perfection V850 Pro (around $700–$900) is a more specialized option.
Sheet-Fed Scanners for Speed
When you’re working with a large photo collection, sheet-fed scanners can save you a ton of time. These machines automatically pull photos through, much like how a printer feeds paper. You can load a stack of photos and let the scanner do its thing while you focus on something else.
Take the Fujitsu ScanSnap iX1600, for instance. It can process about 40 pages per minute and costs between $400–$500. In terms of photos, this means scanning hundreds of images in an hour – much faster than placing each photo individually on a flatbed scanner.
However, there are trade-offs. Sheet-fed scanners work best with standard-sized photos in good condition. Bent, curled, or thicker photos can jam the machine, and fragile or very old photos should never go through a sheet-fed scanner, as the rollers could damage them. Additionally, most sheet-fed scanners max out at 600 DPI, which is fine for standard 4×6 prints but might not capture enough detail for enlargements or restoration work.
DPI and Resolution: What You Need to Know
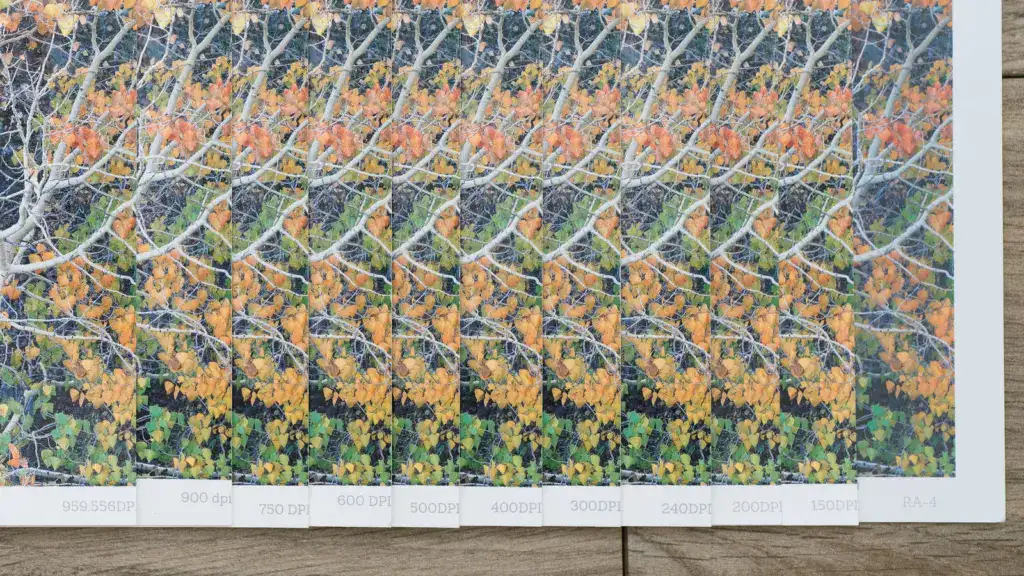
DPI (dots per inch) determines how much detail your scanner captures. A higher DPI means more detail but also results in larger file sizes.
- Use 300 DPI for standard photos, which typically creates files between 2–4 MB.
- Opt for 600 DPI if you plan to enlarge images or need finer detail, with file sizes around 8–15 MB.
For film negatives and slides, you’ll need a much higher resolution – 2,400 DPI or more – since these smaller originals require significant enlargement. These scans can produce files of 50 MB or larger, but they capture incredible detail from the film.
Keep in mind that high DPI settings can slow down the process. For instance, a photo that takes 30 seconds to scan at 300 DPI might take 5–10 minutes at 2,400 DPI. Consider how much time you’re willing to spend versus the quality you need for your project.
With the right scanner and a clear understanding of resolution, you’re ready to move on to Step 3 and fine-tune your scanner settings for the best results.
Step 3: Set Up Your Scanner Settings
Once you’ve chosen your scanner, it’s time to configure it for the best results. Setting everything up correctly from the beginning can save you a lot of time later and ensures your scanned images look great. These settings are the groundwork for efficient and high-quality scanning.
Choose Resolution and Color Settings
The resolution and color mode you select depend on how you plan to use the scanned photos. Resolution determines the level of detail, while color mode affects how colors and tones are captured.
For most family photos, 300 DPI in color mode is a solid choice. It balances image quality and file size, making it ideal for digital sharing, printing at the original size, or creating photo books. For example, scanning a 4×6 photo at 300 DPI results in a file size that’s easy to manage.
If you plan to enlarge photos, go with 600 DPI. This ensures enough detail for larger prints without compromising sharpness. Just keep in mind that these files will be significantly larger – about four times the size of 300 DPI scans – so make sure you have enough storage space.
- Use color mode for faded or tinted photos. This gives you more flexibility for restoring colors during editing.
- For true black-and-white photos, choose grayscale.
- Use line art mode for text-only documents.
Photos from the 1970s and 1980s often show faded or shifted colors. Scanning these in full color mode can capture hidden color details, even if the photo appears sepia-toned now. This is especially useful for restoring their original look.
Pick the Right File Format
Your choice of file format impacts both the quality and future use of your scanned photos. The two main options are JPEG and TIFF, each suited to different needs.
- JPEG: Perfect for most projects, JPEG files are smaller and easier to share, upload, or view across devices. A JPEG saved at 90% quality retains excellent detail while keeping file sizes manageable.
- TIFF: If you’re creating an archival collection or plan to do extensive photo restoration, TIFF is the way to go. It captures every detail without compression, making it ideal for long-term storage or heavy editing. However, TIFF files are much larger – a 4×6 photo can take up 20-25 MB, nearly ten times the size of a JPEG.
For everyday scanning, JPEG is usually the more practical choice. But for special projects or preserving family heirlooms, the extra detail of TIFF can be worth the larger file size.
Set Up Batch Scanning
Batch scanning can save you a lot of time when working with multiple photos of the same size and type. This feature allows you to scan several photos at once and automatically separates them into individual files.
Most flatbed scanners can fit four 4×6 photos at a time. To make the process smoother:
- Leave at least half an inch of space between each photo so the scanner can detect the edges.
- Group photos by type – don’t mix color and black-and-white images in the same batch.
- Keep photos of similar age and condition together to ensure consistent results.
For best results, make sure the photos are straight and evenly spaced. This helps the scanner’s auto-cropping feature work more accurately, reducing the need for manual adjustments later.
If you’re tackling a large project, consider creating scanning profiles in your scanner software. These profiles let you save your preferred settings – like resolution, color mode, file format, and destination folder – as a preset. This way, you won’t have to reconfigure everything for each session, and your scans will stay consistent.
Some scanner software also offers features like automatic color correction and dust removal. While these tools can enhance image quality, they may slow down the scanning process. Test them on a few photos first to decide if the improvement is worth the extra time, especially when scanning hundreds of images.
With your settings fine-tuned and batch scanning ready to go, you’re all set to start digitizing your photo collection.
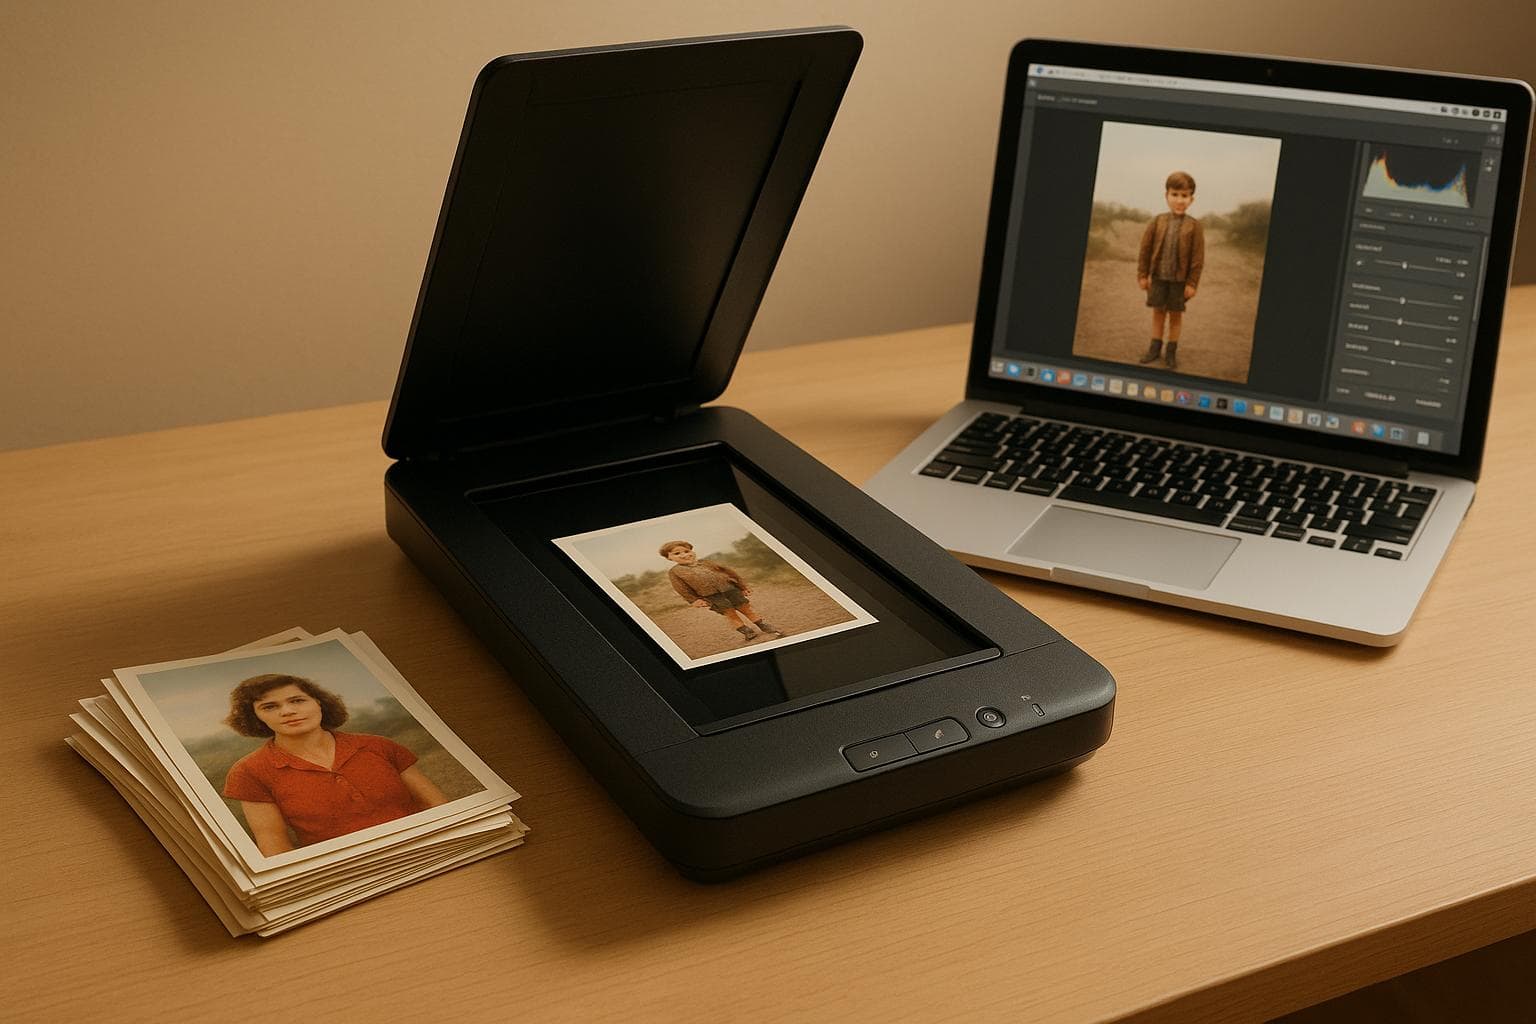
Step 4: Scan Your Photos
Start scanning with your chosen settings to create sharp, digital versions of your photos.
Position Photos Properly on the Scanner
Place your photos on the flatbed scanner, leaving about a 1/8-inch gap between each one. This spacing helps the scanner software automatically detect, crop, and separate the images accurately. Make sure the photos are straight and well-aligned to keep the process smooth and efficient.
Preview Before Scanning
Take advantage of your scanner’s preview feature before performing the full scan. This step allows you to check the positioning and framing of your photos. It’s an easy way to catch and fix issues like crooked placement or unwanted shadows before finalizing the scan. Most scanner software provides a low-resolution preview in seconds, so you can tweak the setup without wasting time.
The preview also confirms that the software’s batch scanning feature is set up correctly. Look for clear boundaries around each photo in the preview – this ensures the scanner will separate them properly when processing.
Scan Multiple Photos with Batch Processing
If you’re working with a large collection, batch processing can save you a lot of time. Modern scanner software can automatically detect and separate individual photos during a single session. For the best results, use photos that are similar in size and condition, as this helps the software apply consistent settings across multiple images.
Once you’ve scanned the photos, you can move on to organizing and improving your digital collection.
sbb-itb-e3574dd
Step 5: Organize and Improve Your Digital Photos
Once you’ve scanned your photos, the next step is to organize and refine them. By keeping your files well-structured, enhancing the images, and securing backups, you’ll ensure your digital collection stays accessible and protected.
Name Files and Create Folders
Use a clear and consistent naming system for your files, like “YYYY-MM-DD_Event_People.” For instance, a photo titled “1985-12-25_Christmas_Johnson-Family” immediately tells you the date, occasion, and individuals in the image. Similarly, “1972-06-15_Wedding_Mom-Dad” provides key details at a glance.
Create a folder structure that works for your collection and stick to it. You might group photos by decade (e.g., 1960s, 1970s, 1980s), family branch (e.g., Mom’s Side, Dad’s Side), or major life events (Childhood, Wedding, Vacations). The goal is to make it easy to find specific photos later.
Avoid generic names like “IMG_001”, which tell you nothing about the photo’s content. If you’re organizing photos from an event, consider adding keywords to the file names, such as “cake-cutting”, “group-photo”, or “first-dance”, to quickly identify specific moments.
Once your files are organized, you can focus on enhancing the images.
Make Basic Photo Improvements
Start by adjusting brightness and contrast to bring faded photos back to life. Most photo editing tools have easy-to-use sliders for these adjustments. Older photos often benefit from a slight brightness boost and a touch more contrast to restore their vibrancy.
For color correction, look for tools like “auto color” in your editing software. This feature can often fix common issues like yellow or red tints in aging photos. If the automatic fix doesn’t quite work, you can manually tweak the color temperature or individual color channels to get the desired look.
Next, tackle dust spots and scratches that might have been picked up during scanning. Tools like “spot healing” or “clone stamp” in most editing programs can help you clean up these imperfections. Zoom in to 100% for precision, but focus on the most noticeable flaws rather than obsessing over every tiny speck.
If your scanner captured unwanted edges or damaged parts of the photo, cropping can help. A tighter crop not only removes distractions but can also improve the overall composition by drawing attention to the main subject.
Always save your edits as new files. This way, you preserve the original scans in case you want to revisit or re-edit them later.
Back Up Your Digital Photos
To protect your digitized memories, follow the 3-2-1 backup rule: keep three copies of your photos, store them on two different types of media, and ensure one copy is kept off-site. This might sound like overkill, but it’s essential for safeguarding irreplaceable memories.
Cloud storage is a great option for your off-site backup. Services like Google Drive, Dropbox, or iCloud automatically sync your files to remote servers, making it easy to store your organized folders as you complete each scanning session.
For a local backup, invest in an external hard drive. A 1TB drive, which costs about $50-$80, can store hundreds of thousands of photos. Set up automatic weekly backups or manually copy new files after every scanning session.
Periodically test your backups by opening a few random photos from each storage location. It only takes a few minutes and ensures your files are accessible when needed.
For long-term storage, consider physical media like archival-quality DVDs or Blu-ray discs. These are ideal for preserving high-resolution versions of your most cherished photos. Store these discs in a safe location separate from your computer and external drives.
Backing up your photos is the final step in preserving your memories, ensuring they remain safe and accessible for future generations.
Turn Your Photos into Memory Books
Once your photos are neatly organized and digitized, why not take the next step and turn them into something truly special? Meminto Stories provides an easy way to create personalized hardcover books that preserve not just your photos but also the stories behind them. These memory books transform your collection into timeless keepsakes.
The platform integrates seamlessly with your digitized photos. Simply upload your digital files and choose from various themes to match your vision. Whether you’re crafting a life story book spanning decades, a childhood memories book focused on those early years, or a family history project that connects generations, your photos become the heart of these meaningful projects.
To bring your photos to life, Meminto offers guided storytelling prompts and AI-powered speech-to-text tools. Instead of letting old photos sit in a box with their stories fading, you can record your memories while looking at each picture. For example, a digitized photo from 1978 might inspire you to share everything you remember about that summer vacation – the people, the place, and why that moment mattered. The AI converts your spoken words into text, making it easy to add rich context to every image.
If you’re working on a family project, the collaborative features are a game-changer. Relatives can contribute their own memories and perspectives to the same photos, creating a fuller and more detailed narrative. Maybe your aunt recalls a family gathering differently, or your parents can share historical insights about relatives you never met. These shared memories turn the book into a collective treasure.
For those who want more control, Meminto allows you to start with a custom book structure. You can design chapters and sections around themes like “Our Family’s Immigration Story”, “Mom’s Childhood in the 1950s”, or “Five Generations of Family Weddings.” Your digitized photos take center stage, while the flexible design tools let you tailor the book to your vision. The result is a professionally crafted, high-quality hardcover book.
The finished product is built to last, with durable hardcover printing that ensures your photos and stories are preserved for years to come. These books make meaningful gifts or heirlooms to pass down to future generations. Plus, you’ll receive a digital flipbook version so you can easily share your creation with family members, no matter where they live.
Starting at $99 for a 100-page book, Meminto Stories turns your digitized photo collection into a professional, one-of-a-kind family heirloom. With a generous two-year writing window, you can take your time adding memories and stories as you rediscover moments from your collection.
This is your chance to turn your digitized photos into a lasting family history, ensuring that both the images and the stories they tell are preserved for generations to come.


Conclusion: Start Digitizing Your Photo Collection
Preserve your memories before they fade. By following these five steps – preparing your photos, choosing the right scanner, setting proper configurations, scanning carefully, and organizing your digital files – you’re taking an important step to protect those precious moments from the wear and tear of time. Digitizing not only safeguards your images but also makes sharing them with loved ones a breeze.
The advantages go beyond preservation. Once your photos are digitized, sharing them with family across the country becomes as simple as sending an email or using cloud storage. Plus, you’ll free up valuable physical space – just think, a 1-terabyte drive can hold around 250,000 photos.
Digital photos also make it easy to relive and share memories. With features like keyword, date, or location search, you can instantly access specific moments from your collection.
Most importantly, digitizing your photos now gives you the chance to capture the stories behind them while the memories are still vivid. As the experts at Artifcts put it:
“Remember, photos can’t talk, but you can. Start telling your story today.”
Start small by digitizing a few cherished photos and recording their stories. If you need a little push, October – Family History Month – offers the perfect opportunity to dive into your family’s visual legacy.
Once your collection is digitized and organized, take it a step further by creating memory books. With tools like Meminto Stories, you can turn your digital photos into personalized hardcover books that capture not just the images but the stories, context, and connections that make them special. With a two-year writing window and options to collaborate with family members, you can craft a family history that future generations will treasure.
Don’t wait to preserve and share your family’s legacy. Your visual history deserves to be protected and celebrated in ways that physical photos simply can’t provide. Start today!
FAQs
How should I handle and clean old or fragile photos before scanning them?
When preparing old or delicate photos for scanning, it’s important to handle them with care. Always use clean, dry hands or wear gloves to prevent oils or dirt from transferring onto the photos. To remove dust, gently use a soft brush or a microfiber cloth. For more thorough cleaning, photo-safe wipes can be helpful, but steer clear of water or harsh cleaning solutions, as these can cause irreversible damage. If the photo is curled or bent, take your time to carefully flatten it before scanning. To ensure the best results and minimize the risk of further harm, opt for a flatbed or overhead scanner during the digitization process.
What’s the difference between a flatbed scanner and a sheet-fed scanner for digitizing photos?
When deciding between a flatbed scanner and a sheet-fed scanner, it all comes down to the type of photos you’re working with and what you need from the scanning process.
Flatbed scanners are perfect for handling delicate, old, or uniquely sized photos. Since you scan one image at a time, there’s less risk of damage, making them a safer option for fragile prints. In contrast, sheet-fed scanners are designed for speed, allowing you to process large batches of standard-sized photos efficiently. However, they might not be as gentle, which could be a concern for more sensitive or irregular prints.
To make the right choice, think about your photos’ condition, how many you need to scan, and the level of detail you’re aiming to preserve. Flatbed scanners often provide higher resolution and greater control over settings, which makes them a solid pick for creating high-quality, archival scans.
What’s the difference between saving scanned photos as JPEG or TIFF, and which one should I choose?

JPEG files rely on lossy compression, which shrinks the file size by sacrificing some image quality. This makes them a great choice for everyday tasks like sharing photos online or sending them via email, where keeping the file size small is key.
TIFF files, in contrast, use lossless compression, retaining every detail of the original image. This format is perfect for archiving old photographs, professional editing work, or producing high-quality prints. The trade-off? TIFF files are significantly larger and less practical for web use.
In short, go with JPEG for quick sharing and casual use, and stick to TIFF when preserving detail and quality is your top concern.