


There’s something magical about hearing your grandmother’s voice as she recalls her first love, or the way your dad’s eyes light up when he tells that same childhood story for the hundredth time. These aren’t just stories—they’re threads in the fabric of who we are.
But here’s the thing: memories fade. Voices quiet. And the little moments—the ones that shaped entire lifetimes—risk slipping through our fingers like sand.
What if we could catch them before they disappear?
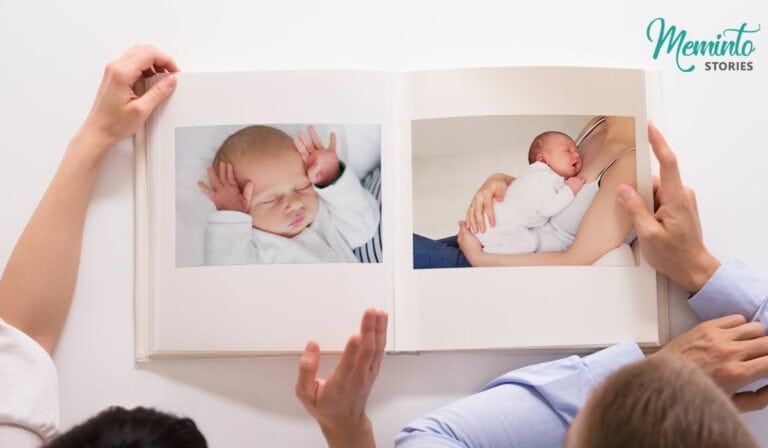
Imagine curling up with a warm cup of tea, flipping through pages filled with your family’s laughter, heartbreak, resilience, and joy. Like a time capsule made of words, each page holding not just facts, but feelings. The kind that tug gently at your heart and remind you where you come from.
Turning oral histories into books is more than just preserving stories. It’s like bottling the essence of a soul and passing it down, so one day your daughter, or her daughter, can read and whisper, “I feel like I know her.”
This isn’t about making a biography. It’s about holding on to what truly matters: connection, love, and the stories that make us who we are.
Here’s a quick guide to transform spoken narratives into a polished book:
- Transcribe Audio: Use tools like AI speech-to-text to convert recordings into text. Edit for clarity while keeping the speaker’s unique voice.
- Organize Content: Structure stories chronologically, by themes, or a mix of both for a natural flow.
- Polish the Text: Edit to remove filler words, fix grammar, and ensure smooth transitions while maintaining authenticity.
- Add Context and Images: Enhance stories with historical details, photos, and documents to provide depth and visual appeal.
- Build the Structure: Use clear chapters, transitions, and multiple perspectives to create a cohesive narrative.
- Design the Book: Choose a professional layout, readable fonts, and a durable hardcover format.
- Review and Print: Double-check everything, get narrator approval, and finalize for printing.
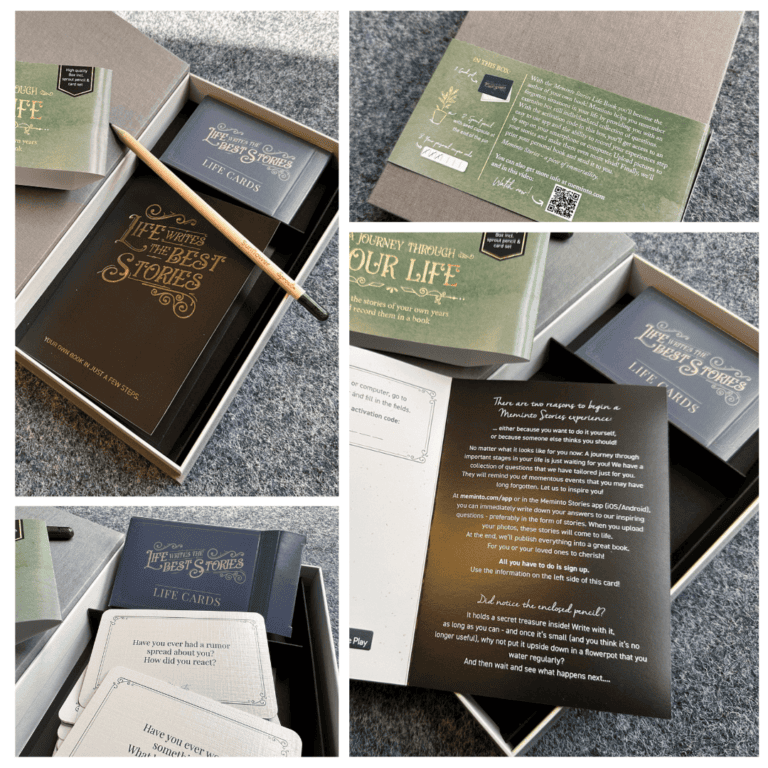
Quick Tip: Platforms like Meminto Stories streamline this process with AI transcription, guided questions, and professional printing starting at $99.
Preserve your legacy – start documenting today!
Step 1: Create Text from Audio
Transcription Options
Decide on the best approach for your needs. While doing it manually can be precise, it often takes a lot of time. Tools like Meminto Stories’ speech-to-text feature offer a quicker alternative, automatically transcribing audio and even fixing grammar issues along the way. Once you have the text, take time to refine it for better accuracy and readability.
Getting Words Right
Making sure the transcript is accurate is key to preserving the original story. Use these tips to polish your transcript:
- Keep the Speaker’s Style: Retain unique expressions but cut out unnecessary repetition.
- Make It Clear: Break up long sentences and remove any false starts for smoother reading.
- Double-Check Everything: Compare the transcript to the audio to confirm details like names, dates, and any specific terms or references.
“My recorded answers were transcribed perfectly.” – Lynn, Auckland
Meminto Stories’ tool provides clean, accurate text, giving you a solid starting point for further edits.
Step 2: Sort and Order Content
Time vs. Topic Order
Choose the best way to organize your transcript. Here are a few approaches to consider:
- Chronological Structure: Lay out events from the earliest to the most recent.
- Thematic Groups: Group content by related topics or themes.
- Hybrid Approach: Combine timelines with themes for more layered stories.
Picking the right structure helps create a logical flow for your narrative. Meminto Stories offers guided questions to naturally structure and maintain a clear progression.
Making a Clear Plan
Turn scattered memories into an organized story with a content map:
- Step 1: Content Assessment
Review your transcript to identify key themes or time periods. Group related content to uncover patterns. - Step 2: Story Framework
Outline the main sections of your book based on the structure you’ve chosen.
| Section Type | Ideal For | Example Structure |
|---|---|---|
| Timeline-Based | Life Stories | Childhood → Youth → Adult Years |
| Theme-Based | Topic Collections | Family → Career → Hobbies |
| Combined | Complex Narratives | Early Career (Time) + Growth (Theme) |
- Step 3: Content Integration
Organize your transcript into the sections you’ve outlined. Meminto Stories’ collaborative tools make it easy for contributors to offer perspectives, enriching the final narrative.
Well-told life stories depend on asking the right questions.” – Meminto
Thoughtful questions can highlight connections and create smooth transitions between sections. Next, you’ll refine your text further.
Step 3: Polish the Text
Keep Style While Fixing Text
When polishing a transcript, it’s crucial to preserve the narrator’s unique voice while improving clarity. Focus on these key areas during editing:
| Editing Focus | Keep | Remove |
|---|---|---|
| Speech Pattern | Unique expressions | Filler words and false starts |
| Grammar | Natural tone | Major grammatical mistakes |
| Content Flow | Important stories and emotions | Off-topic or unrelated discussions |
AI tools can help streamline this process, creating clean drafts that maintain the original narrative’s essence.
“Meminto makes it easy to tell your story with just a simple audio recording. And the best part? We’ll convert your spoken story into gorgeous text (with correct grammar and without all the ums and ahms…)” – Meminto
After refining the style, focus on removing unnecessary content.
Remove Extra Content
Once the text is polished, cut out anything that doesn’t contribute to the main story. Edit with purpose – keep what moves the narrative forward and remove what doesn’t.
Here’s how to ensure a smooth and natural flow:
- Combine related topics that are discussed at different points.
- Move contextual details to where they make the most sense.
- Create seamless transitions between sections.
For example, Werner, 68, used a guided approach during a Meminto course to record his life story. By answering one question per week, he kept his narrative clear and engaging while staying true to his voice.
Effective editing is all about balancing clarity and authenticity through thoughtful storytelling techniques.
Step 4: Add Background and Images
Include Historical Facts
Incorporate historical details to connect personal stories to larger events. Use specifics like time periods, cultural influences, and locations that shaped the narrator’s experiences.
“At the beginning I had the idea to write down my life story for my children and grandchildren. Thanks to Meminto’s questions, my story became colorful and multifaceted.” – Maria, 63
Weaving historical context into personal narratives adds depth and perspective. This foundation prepares your story for the next step: enhancing it with visuals.
Add Photos and Documents
Bring your story to life by including images and documents. These visuals add authenticity and emotional depth to your narrative.
- Family photos to highlight relationships and memories
- Historical documents to verify events and add credibility
- Pictures of locations to set the scene
- Personal items that evoke emotion and connection
“Through the questions, memories come up again. Even videos could be loaded into the book. Emotions like when it all happened!” – Verena, 32
Meminto Stories lets you include various types of media, blending text with photos, videos, and documents to create a rich, multimedia narrative.
Choose visuals that enhance your story and make it more engaging, ensuring each element serves a clear purpose in bringing the narrative to life.
sbb-itb-e3574dd
Step 5: Build the Story Structure
Write Clear Parts
Start your story with a strong opening that sets the stage and grabs attention. Make sure each part of your narrative flows naturally, with smooth transitions linking different life periods or themes.
Key elements to include:
- An engaging opening that introduces the narrator’s voice
- Seamless transitions between life stages or themes
- Clear chapter divisions based on major events
- A meaningful conclusion that ties everything together
Meminto Stories simplifies this process with its guided questions, which help storytellers maintain a natural flow. These prompts build on each other, ensuring no important details are missed while keeping the narrator’s voice intact. To take your story further, consider weaving in different perspectives.
Mix Different Views
Once your main narrative is in place, adding multiple perspectives can enrich the story. Here’s how to do it effectively:
- Balance Multiple Voices
Blend various viewpoints into a cohesive story. Meminto’s platform allows multiple contributors to share their memories and insights effortlessly. - Preserve Authenticity
Keep each narrator’s unique voice intact while maintaining the overall flow of the story. The platform’s question-based approach helps retain individual styles. - Provide Context
Place each perspective within its historical or personal background, helping readers see how these viewpoints fit into the larger narrative.
The goal is to combine structure with genuine storytelling, creating a layered narrative that captures the essence of oral history while staying engaging and easy to follow.
Step 6: Set Up Book Design
Choose Layout Elements
Once your story content is polished and organized, the right design can make it shine. A thoughtful layout not only makes the book easier to read but also complements the oral history it contains. Many opt for a 6×9-inch format, which works well for balancing text and images while maintaining a professional look.
Here are some important design elements to consider:
- Typography: Use fonts that are easy to read, with proper sizing and spacing.
- Chapter Breaks: Include clear visual separations to mark shifts in stories or time periods.
- Cover Design: Choose a cover that reflects the tone and essence of the story in a polished, respectful way.
These choices set the stage for a clean, reader-friendly layout, which we’ll dive into further in the next steps.
“Sharp, full-color printing, high-quality paper and durable binding.” – Maria, San Francisco
Make Books Easy to Read
Designing a book isn’t just about aesthetics – it’s about creating a seamless reading experience. A clear, accessible layout helps readers stay engaged and highlights important moments in the story. To achieve this, focus on these key features:
Print and Design Features
- Use full-color printing for photos and documents to enhance visual appeal.
- Opt for high-quality paper to prevent bleed-through and maintain durability.
- Choose a sturdy hardcover binding for a lasting finish.
- Place images thoughtfully to complement the text without overwhelming it.
- Ensure strong contrast between text and background for easy readability.
“It was so easy to use, and I am not really tech-savvy…” – Markus, Munich
A well-designed book not only preserves these stories for future generations but also respects the voices and experiences they represent.
From Oral History to Written Story: 3G Authors Discuss Writing …
You are currently viewing a placeholder content from YouTube. To access the actual content, click the button below. Please note that doing so will share data with third-party providers.
Step 7: Check and Print
After completing the design, the final step is to carefully review everything before moving on to printing.
Review Every Detail
A thorough review of your oral history book is essential before finalizing. Focus on ensuring accuracy and consistency in areas like:
- Names, dates, and locations
- Historical facts and context
- Photo captions and credits
- Chapter transitions and the overall flow of the stories
- Grammar, spelling, and formatting
Using a detailed checklist can help you stay organized and catch any errors that might otherwise go unnoticed.

Confirm with Narrators
It’s important to get the narrators’ approval before publishing. This ensures their stories are accurately represented and builds trust in the process.
“With my family, the experience became even more meaningful.” – Lauren, Orlando
For narrator approval:
- Share the full draft with them for review
- Give them enough time to read and reflect
- Note any changes they request
- Address concerns quickly and efficiently
- Obtain written consent for publication
“During the editing process, the Meminto support was always quick, friendly and competent to answer any questions.” – Maria, 63
Decide on Publishing
Choose a publishing method that fits your budget, timeline, and quality expectations. Modern platforms make it easier than ever to turn your project into a professional book.
For example, Meminto Stories offers a user-friendly publishing solution with these features:
Meminto Stories also includes tools like speech-to-text conversion and collaborative editing, simplifying the process of creating a polished final product. The hardcover format ensures durability, while full-color printing enhances the presentation of photos and documents.
Conclusion: Begin Your Histories to turn into a Book Project
Start Now
Capture your memories and secure your legacy – start your oral history book project today. Use voice recordings, videos, or written notes to begin documenting your story. Every memory you share adds to your family’s connection to its past, ensuring these stories are preserved for future generations.
“Life is not always perfect. But it’s always what you make it. So make it count. Make it memorable. And never let anyone steal your happiness.” – Meminto
Meminto Stories makes it simple to turn your memories into a timeless keepsake.
Using Meminto Stories

Transform your oral histories into a professionally crafted book with Meminto Stories. The platform offers:
| Feature | How It Helps |
|---|---|
| AI Speech-to-Text | Converts your spoken words into polished text |
| Guided Questions | Helps structure and enrich your narrative |
| Collaborative Tools | Lets family members contribute |
| Professional Printing | Produces high-quality hardcover books |
“I felt well taken care of by Meminto. They made me feel like my project was just as important to them as it was to me. I am proud to finally hold my book in my hand. It brings me joy and satisfaction, and I can cross it off my bucket list.” – Anja
Even if you’re not tech-savvy, the platform is easy to use. Reiner, 74, shared his experience:
“I wrote the whole book on my smartphone and am amazed at how well it worked despite the small display.”
Starting at $99, the basic package includes one hardcover book with 100 pages. You’ll have up to two years to complete your project, giving you plenty of time to gather, organize, and refine your stories before publishing.